
Font Tools
Paired setup and export utilities for building a small display, symbol, or icon font in Affinity Designer.
Paired setup and export utilities for building a small display, symbol, or icon font in Affinity Designer.
Workflow
- Run
affinity-font-setup.jsto create a glyph workspace. - Draw each glyph inside its artboard.
- Run
affinity-font-export.jsto write the working.otffile.
The two scripts belong together: setup creates consistently named artboards with locked metric guides, and export parses those artboards into font data.
Installation
-
Download the zip file and unzip it.
-
Run each script in one of two ways:
a) Run directly — Open the Script Editor panel (Window > Scripting > Script Editor), paste the contents of the required
.jsfile into the editor, and press Run.b) Save to Script Library first — Follow step (a) above, then click Save As… to save the script to the Script Library. Open the Script Library panel (Window > Scripting > Script Library) and click the saved script once to run it.
Font setup
Creates a new Affinity Designer document set up as a font workspace: one artboard per glyph, laid out in rows of 10, each with locked metric guides. Run this first, draw your glyph artwork into the artboards, then run affinity-font-export.js to build the .otf file.
Purpose
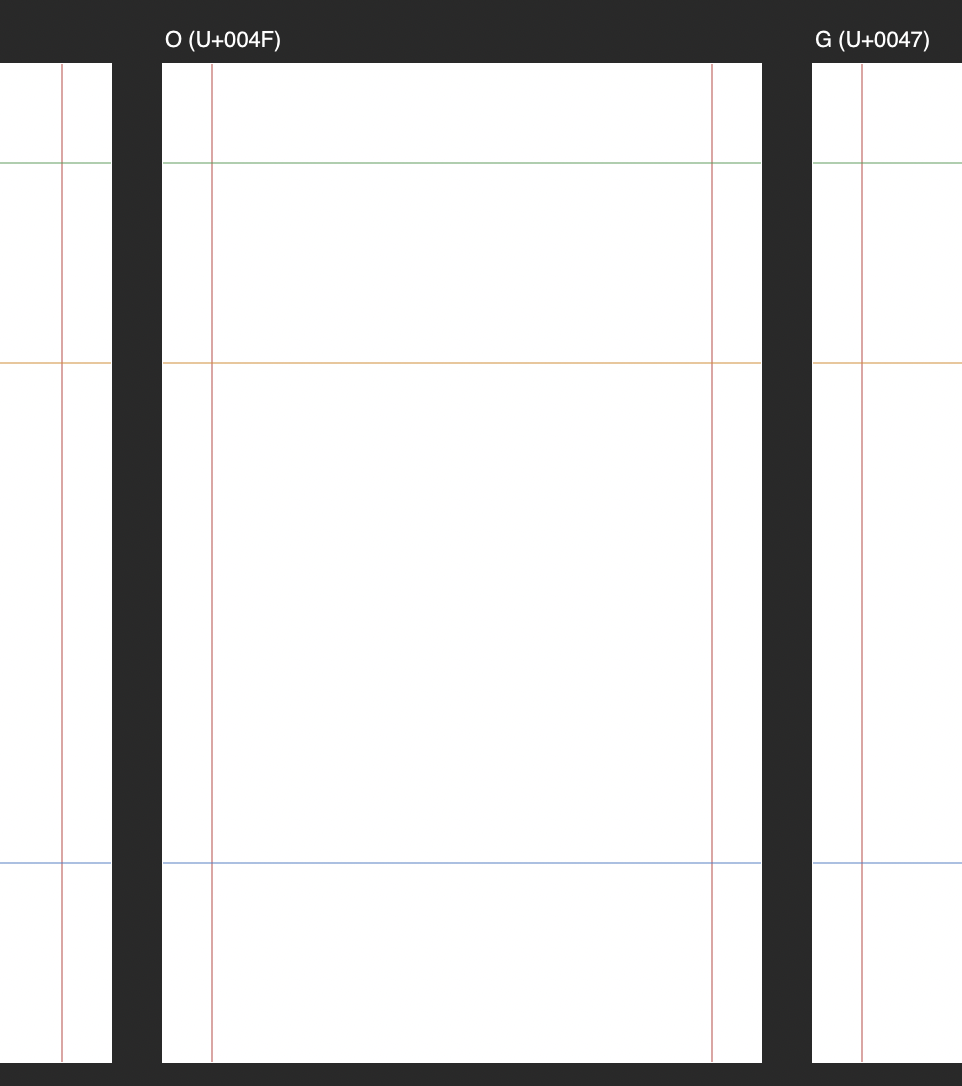
Turns a font idea into a drawing workspace in one click. You choose which characters the font will contain and the basic metrics, and the script builds a 1000 dpi document where every glyph gets its own artboard — one em-square tall — with colour-coded metric guides already in place and locked:
- Red verticals — left and right sidebearings. The distance between them becomes the glyph’s advance width on export.
- Blue horizontal — baseline. Glyph artwork sits on this line.
- Green horizontal — cap-height, optional.
- Orange horizontal — x-height, optional.
Artboards read top-to-bottom as Uppercase → Lowercase → Digits → Other, both on the spread and in the Layers panel. Each artboard is named Name (U+XXXX), for example G (U+0047) — the export script parses these names, so do not rename them.
Setup dialog
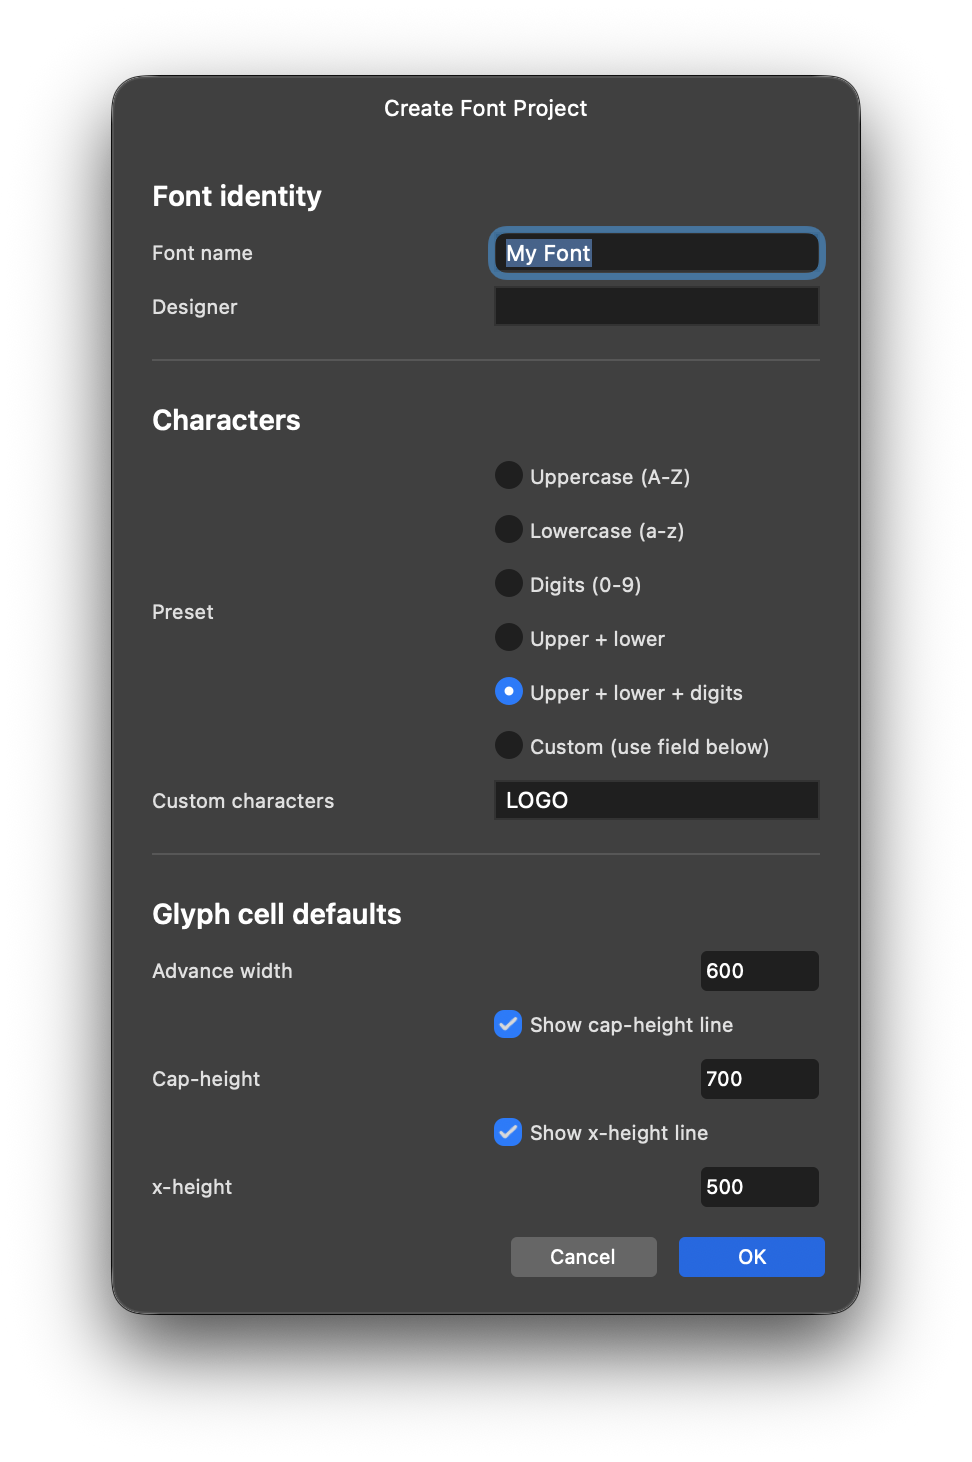
- Font name — working title of the project, default
My Font. - Designer — optional, kept for future use.
- Preset — which characters receive artboards:
Uppercase (A-Z),Lowercase (a-z),Digits (0-9),Upper + lower,Upper + lower + digitsby default, orCustom (use field below). - Custom characters — only used with the Custom preset. Every unique non-space character receives an artboard; duplicates and whitespace are dropped.
- Advance width — default advance for every cell, 100–2000, default 600. Individual glyph widths come from the RSB marker position at export time.
- Show cap-height line / Cap-height — green guide, 100–1000, default 700.
- Show x-height line / x-height — orange guide, 100–1000, default 500.
Cancelling the dialog creates nothing. Choosing a preset with no characters logs a note and stops.
Drawing tips
- Draw with closed outlines. Open strokes export as-is and may not fill the way they look on screen.
- Keep artwork inside the sidebearing lines unless intentional manual spacing is wanted.
- To change one glyph’s width, unlock and drag its red RSB line.
- To change global metrics, move the corresponding guide in every artboard, or re-run setup and copy artwork across.
- Guides are locked to prevent accidental movement; unlock a guide only to reposition it, then lock it again.
Setup requirements
- Affinity by Canva 3.3.
- No document needs to be open — the script creates a new one.
Setup limitations
- This is a hobby/small-project font maker, not professional type software. There is no kerning, hinting, multiple weights, OpenType features, or adjustable vertical metrics.
- It is best for dingbat, symbol, icon, and logo fonts, not body-copy text faces.
- Artboards may initially show mixed expanded/collapsed Layers-panel state; use Collapse All to tidy them.
- Renaming an artboard so it no longer contains
(U+XXXX)causes export to skip it. - Deleting a required metric marker causes export to skip that glyph.
- The RSB marker is clamped inside its artboard.
- Reverting a full setup takes several undo steps.
Setup changelog
1.1.0 - Failures now show an alert dialog instead of only logging to the console; settings moved into a CONFIG object
1.0.1 - Removed no-op isLandscape assignment; clear end-of-run selection so artboards come up uniformly collapsed
1.0.0 - Initial version
Font export
Reads the artboards built by affinity-font-setup.js, extracts the glyph outlines, and writes a working .otf font file to a folder you choose. Run this after drawing the glyphs.
Before first use: open
affinity-font-export.jsand setOUTPUT_FOLDERto a real folder. The folder must also be enabled under Affinity Settings → File System Access. Otherwise, export writes fail withPERMISSION_DENIED.
Purpose
Converts a drawn font workspace into an installable font. The script walks every artboard on the first spread, converts glyph outlines into font coordinates, builds the OpenType tables in pure script code, and saves <FontName>.otf. A .notdef fallback glyph is always included as glyph zero.
Export workflow
- Run
affinity-font-setup.jsto create the workspace. - Draw glyphs into the artboards.
- Run
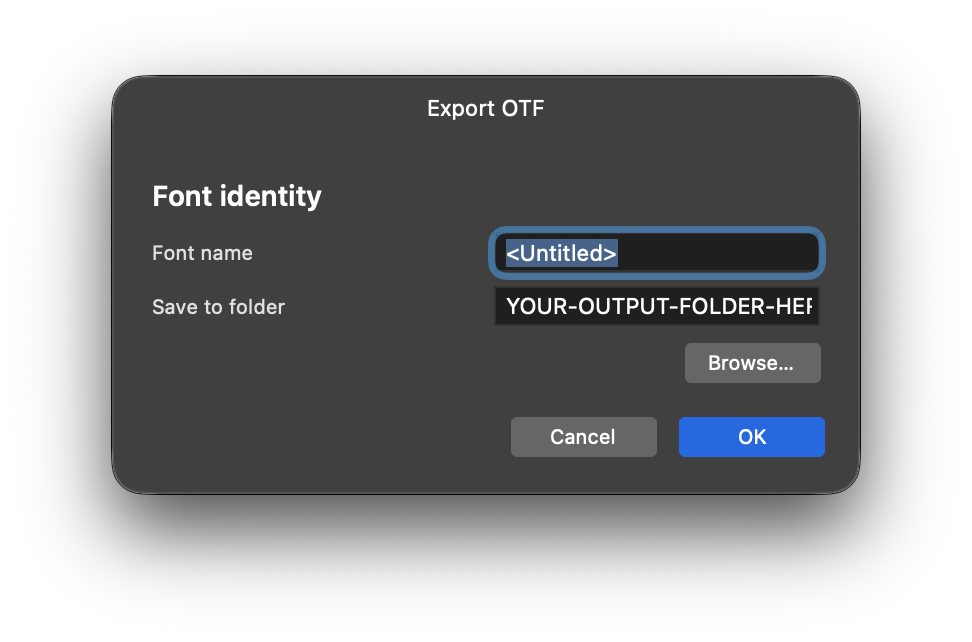
affinity-font-export.jswith the workspace document open. - Type the font name, check the save folder, and press OK.
- Read the result alert for exported glyphs, file location, and skipped artboards.
- Install and test the
.otf, then fix drawings and re-export as needed.
A successful run reports the exported glyph count and lists skipped artboards with reasons, such as empty artwork, unparseable artboard names, missing markers, or crossed sidebearing guides.
Export dialog
- Font name — defaults to the document title or
My Font. Characters outsideA–Z a–z 0–9 _ -become_in the file name. - Save to folder — prefilled from
OUTPUT_FOLDER. Leaving the placeholder or an empty field aborts export with a reminder. The folder must be allowed under Affinity Settings → File System Access. - Browse… — opens the operating-system file picker. Because folders alone may leave the picker’s OK disabled, pick any file inside the target folder and the script fills in its folder. Typing the folder manually always works.
Cancelling the dialog exports nothing.
Export requirements
- Affinity by Canva 3.3.
- The workspace document open, with artboards named
Name (U+XXXX)and intact LSB/RSB/baseline markers. - The destination folder enabled under Affinity Settings → File System Access.
Export limitations
- Only artboards on the first spread are read.
- Empty glyph cells are skipped by design.
- Overlapping or self-intersecting outlines export literally; no outline cleanup is performed.
- Vertical metrics and naming fields are fixed per export.
- Each export produces a single Regular weight with no kerning, hinting, or OpenType layout features.
Export changelog
1.2.0 - OS/2 sCapHeight/sxHeight now come from the document’s actual cap-height/x-height marker lines (falling back to defaults only if a document has none), instead of always being hardcoded; standard glyph names (A-Z, a-z, digits, punctuation) now use their predefined CFF SIDs instead of bloating the custom string table; an unexpected error on one artboard is now skipped instead of aborting the whole export; settings moved into a CONFIG object
1.1.0 - “Save to folder” dialog field prefilled from OUTPUT_FOLDER; “Browse…” support; clearer write-failure messages; File.create migration; Windows path support
1.0.0 - Initial version